In this tutorial, I will show you a how to create a fuzzy text effect using a simple technique and a custom brush. This tutorial is written for users who have a basic understanding of the tools and techniques in Photoshop.
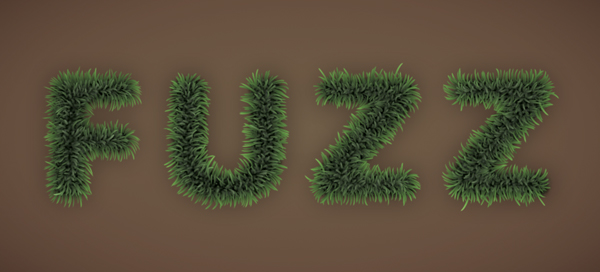
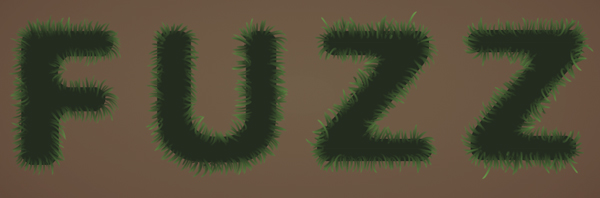
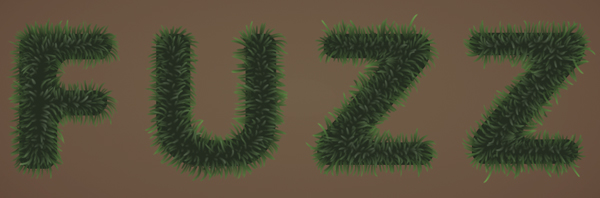
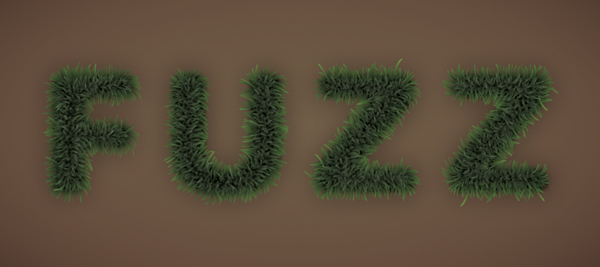
The Final Image
This is what we will be creating:
Step 1: Setting Up the Document
Create a new document that is 1100 x 500px and fill with a brown color. For this image, I used a radial gradient to give the image a slight vignette.

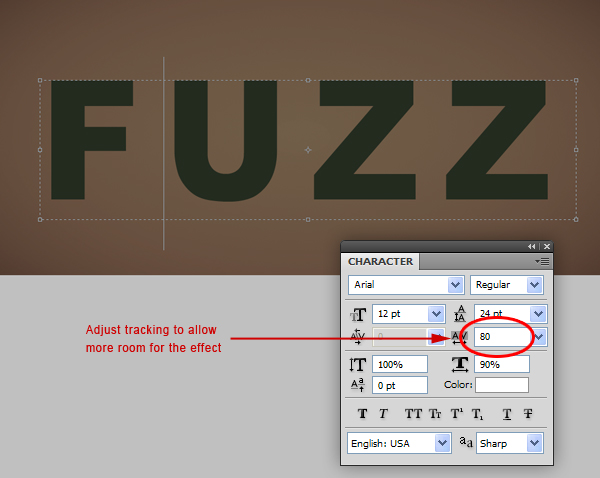
Step 2: Typing the Text
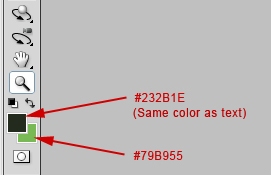
Select the Type Tool (T) and use a bold font to type anything you want. I’m using Arial Black set to a dark green color (#232B1E).
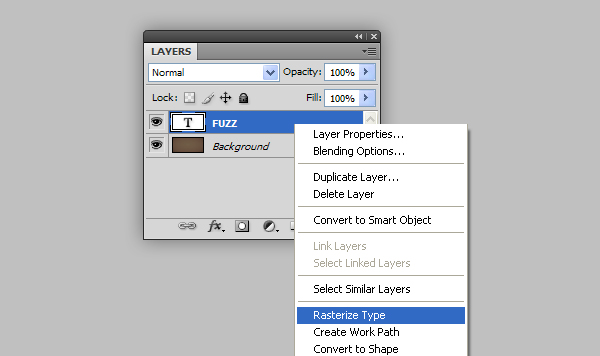
Step 3: Rasterizing Type
To rasterize the font, right click on the text layer and select Rasterize Type
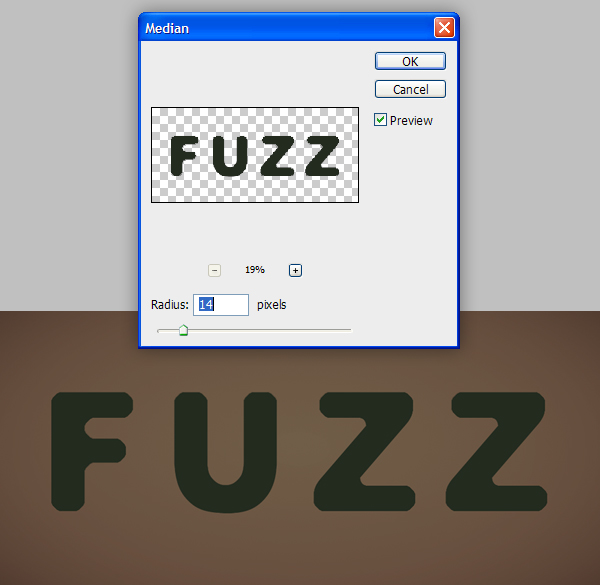
Step 4: Rounding Out the Text
To round out the sharp edges, apply the Median Filter (Filter>Noise>Median) with a setting of 14 px.
Step 5: Setting Up the Colors
Set your foreground/background color to the following (this will be necessary for our custom brush to work properly):
Step 6: Creating a Brush
Now, we want to add some fuzz to our text. To begin, we need to create a new brush. Open the Brushes Panel (F5) and use the following settings:
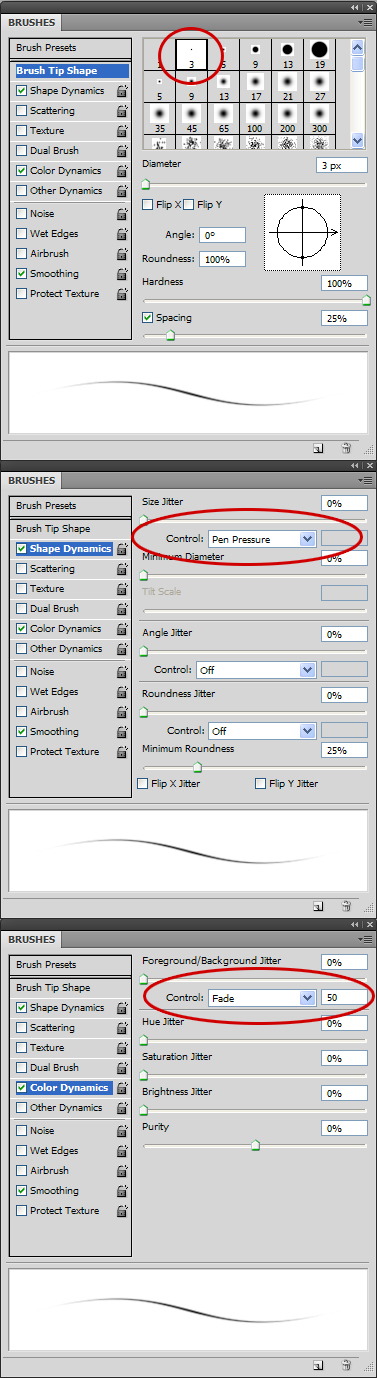
Here are samples of the brush strokes using a pen tablet. If you dont have a tablet, go back in to your brush settings and go to the Shape Dynamics tab and set the Size Jitter’s Control to “Fade” with a setting of 35 or so.
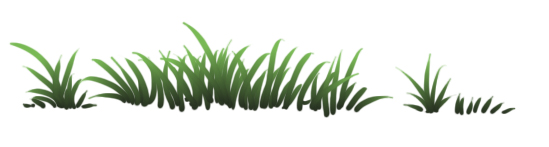
We’ve made grass!
As you see the brush we’ve created allows the base of the stroke to be darker than the tip. This is important as it will mimic natural lighting.
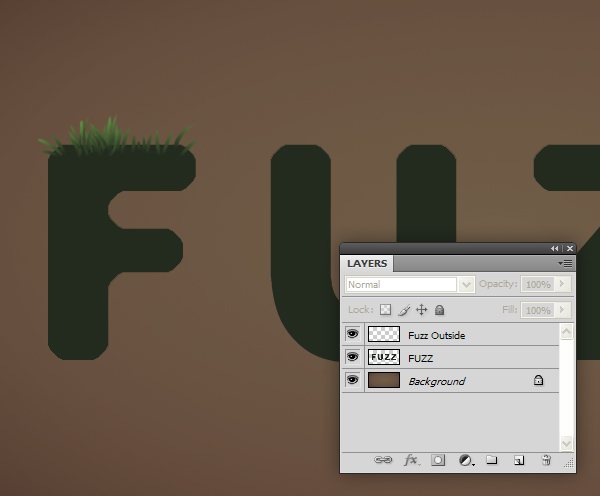
Step 7: Starting The Fuzz
Create a new layer called ‘Fuzz Outside’ and start to draw in to fuzz, always starting your stroke from the base and moving out. you want to stay on the edge of the text for the first round.
Finish each letter:
Make it quicker!
To make this go quicker, copy and paste similar letters (as I did with the letter ‘Z’)
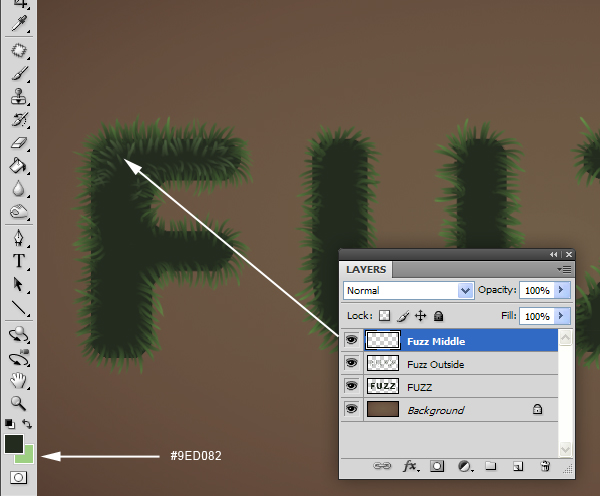
Step 8: Adding More Fuzz
Create a new layer called ‘Fuzz Middle’ and change your background color to a lighter shade of green. Start to make shorter strokes more inside of each letter as shown. These strokes should overlap some of the initial strokes.
Pen Tablet vs. Mouse
If you aren’t using a pen tablet, you may have to adjust the bush’s Size Jitter in the Shape Dynamics tab and Background/Foreground Jitter in the Color Dynamics to get the right length of stroke with the right amount of color fade.
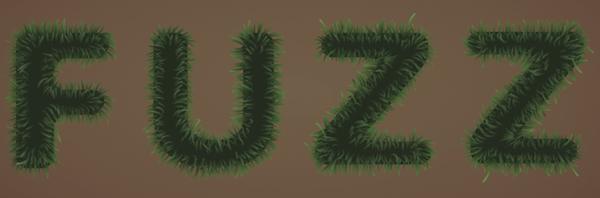
Finish each letter:
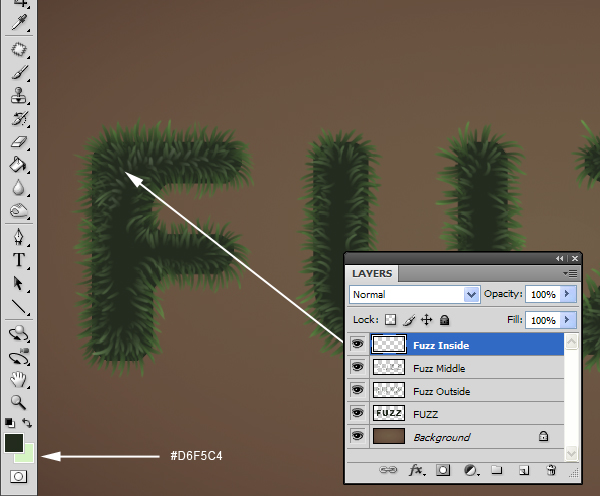
Step 9: Adding Even More Fuzz
Create a new layer called ‘Fuzz Inside’. This time, make a few short strokes completely inside each letter as filler. It is not necessary to make alot of strokes. We will use a simple technique to add filler to the gaps.
Finish each letter:
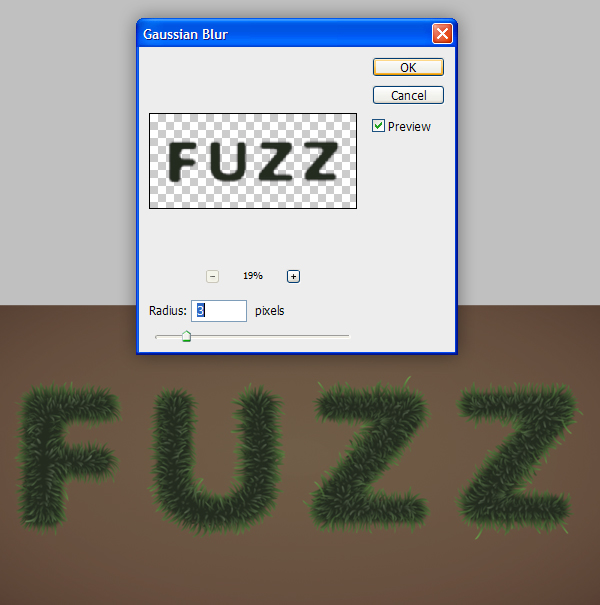
Step 10: Adding a Blur
Select your text layer and give it a Gaussian Blur of about 3 px.
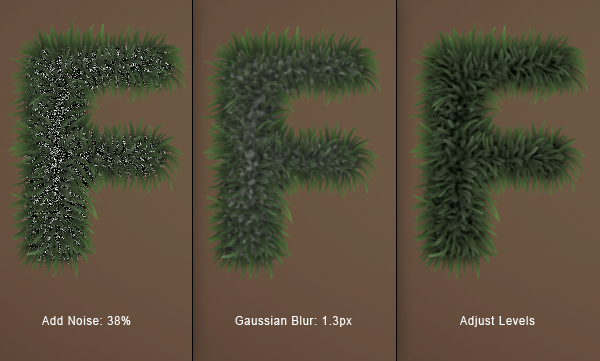
Step 11: Finishing The Fuzz
To complete the fuzz, we need to Add Noise set to 38%, Give it a Gaussian Blur of 1.3 px, and adjust the Levels (Ctrl + L) slightly to increase the contrast of the noise.
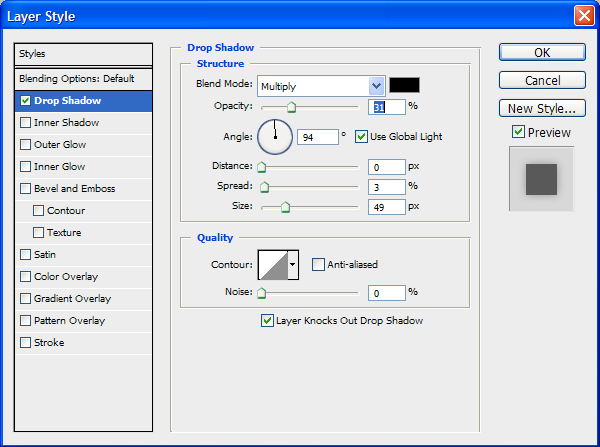
Add a drop shadow to the Text layer:
Your image should resemble this:
Step 12: Starting the Highlights
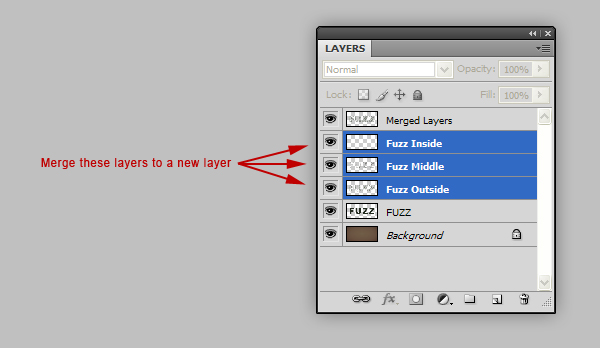
If you want, you can add a highlight around the edge of the text to make it pop more. to do this, select all 3 of your ‘Fuzz…’ layers and merge them to a new layer.
Step 13: Drawing Highlights
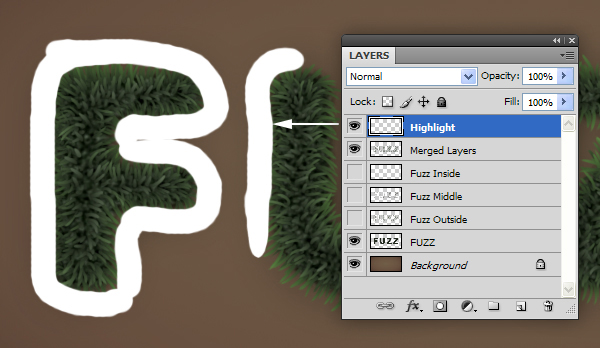
Next, Create a new Layer called ‘Highlights’ and with the color set to white, draw where you want the highlight to go.
Step 14: Adjusting the Low Lights
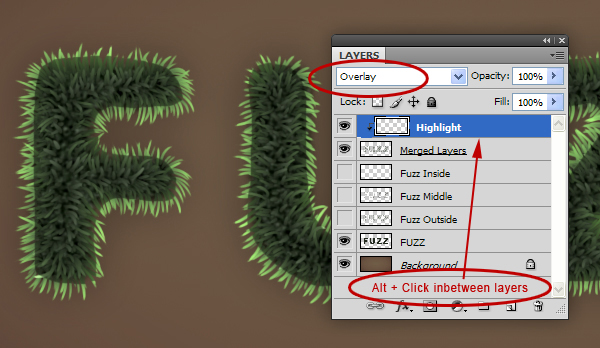
Adjust the Blending Mode of the ‘Highlights’ layer to Overlay and make this layer a clipping layer to the newly merged Fuzz layer
Step 15: Adjusting the Low Lights
To Finish, just give the ‘Highlights’ layer a large Gaussian Blur. You’re Done!